Yanhua ACDP Mini Wiring Diagram:
Suitable for EEPROM 24 25 93 95 Series
Used for in circuit (ICP)and on board(OBP)programming
Features:
No need to remove chip
No need soldering
No need to cut the line
No need to lift the pin
No need soldering
No need to cut the line
No need to lift the pin
Wiring:
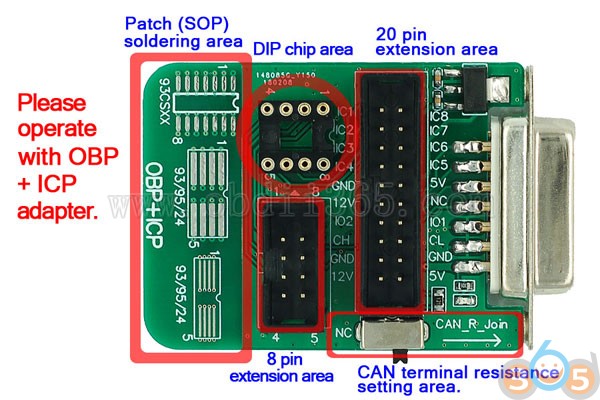
How to use with OBP + ICP adapter
Good to know where is:
Patch (SOP) soldering area
DIP chip area
20 pin extension area
8 pin extension area
CAN terminal resistance setting area
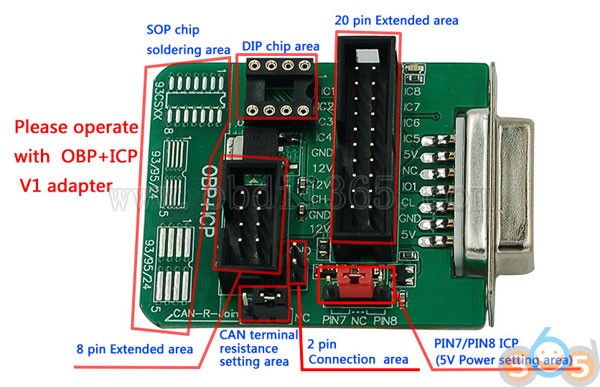
How to use with OBP + ICP V1 adapter
Good to know where is:
Patch (SOP) soldering area
DIP chip area
20 pin extension area
8 pin extension area
CAN terminal resistance setting area
2 pin connection area
Pin 7 / pin 8 ICP (5V power setting area)
How to identify the first pin of SOP8 chip:
Method 1:
The pin corresponding the round point is the first pin
Method 2:
The leftmost pin on the side of chip slope is the first pin

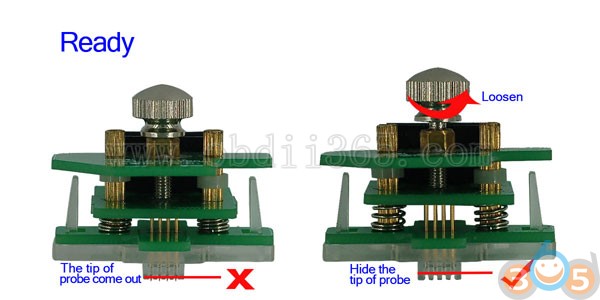
Ready for key programming:
Hide the tip of probe
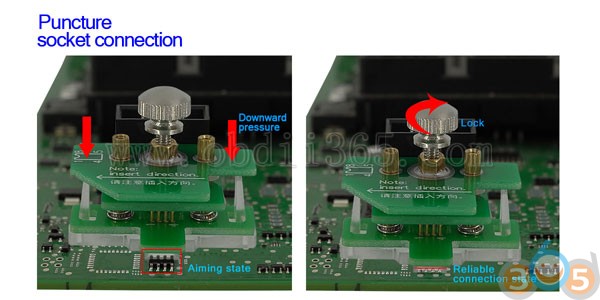
Puncture
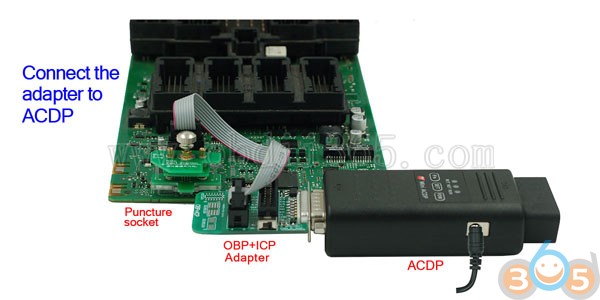
Socket connection:
Check the lock and reliable connection state
How to connect the adapter to ACDP mini:
Attention please when removing:
Retract the tip of probe

Power supply to the target board:
Pls supply the power to the target board according to the actual wiring method of the target board (+12V, GND)
Note that the pic here is only an example of ICP power supply

OBP connection diagram:
Mode 1:
Insert the DIP8 chip in the 8-pin DIP socket directly
Mode 2:
Solder the SOP8 chip on the corresponding solder pad with the soldering iron
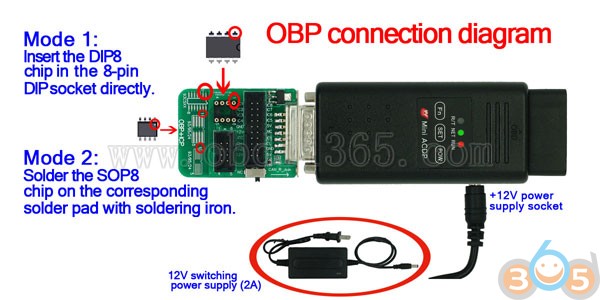
You should have 12V switching power supply (2A)
Yanhua Mini acdp Tech Support: http://www.obdii365.com/


 RSS Feed
