Whatsapp : +86 18259252285
Skype: obdii365.com
E-Mail:[email protected]
How to adds a Proximity Key on a Toyota Pruis V Hybrid year 2012 using Auro OtoSys IM100/IM600 tablet.
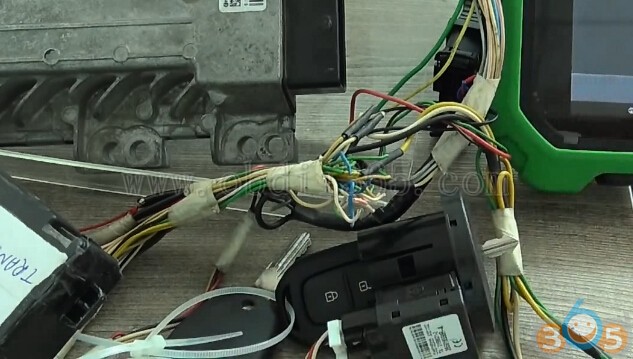
Connect device with vehicle via OBD
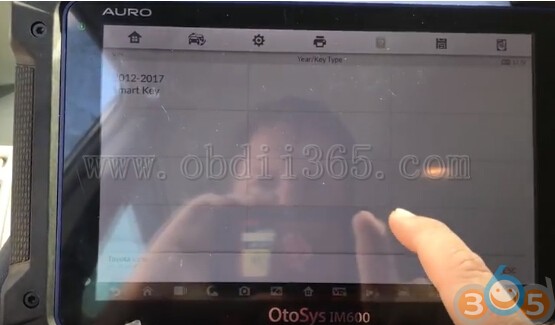
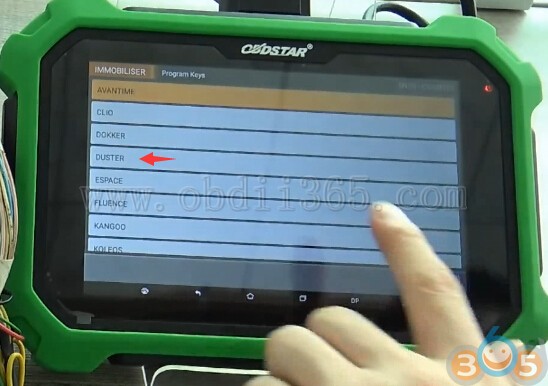
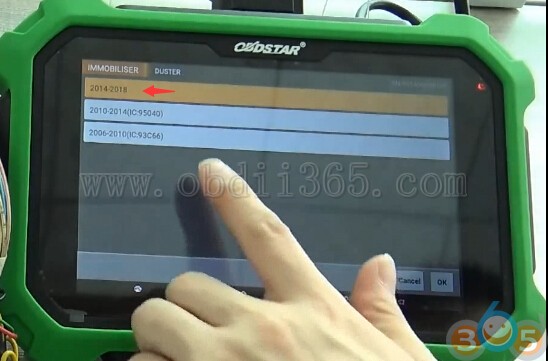
Select IMMO->Toyota->Manual Selection->region USA->Pruis V->2012-2017 Smart Key->Keyless System (CAN)->Add Smart Keys
The position for learning include: 5
Then put a smart key to be learned close to the START Button within 30 sec
Registering key in progress
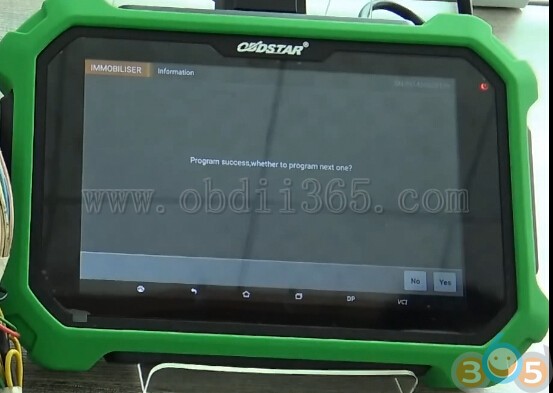
Pruis V 2012 key learning success.
Whatsapp : +86 18259252285 Skype: obdii365.com E-Mail:[email protected]
FVDI J2534 interface comes with a PS Push Switch which can turn this interface from J2534 mode to ELM327 mode. Here’s the guide to install ELM327 software ScanMaster ELM and PCMSCAN for FVDI J2534 adapter.
ScanMaster ELM V2.4.12
ScanMaster ElmScan is simple, easy-to-use, intuitive software for automotive diagnostics.
Multi-language: English, Dutch, French, Spanish
Key Features
PCMSCAN v2.1
PCMSCAN is a fully featured generic OBD-II scanner and diagnostic tool that supports a wide variety of OBD-II hardware interfaces. It allows viewing, charting, logging and playback of diagnostic data in real time via the vehicle’s OBD-II diagnostic data port. It also allows viewing of vehicle Diagnostic Trouble Codes (DTC’s), Freeze Frame data, and other vehicle information.
Language: English
Key Features:
Main Steps:
Step 1: Install ScanMaster-ELM v2.1 software
Step 2: Install PCMSCAN V2.4.12 software
Step 3: Install FVDI J2534 driver
Step 4: Setup COM Port for ScanMaster-ELM
Step 5: Run PCMSCAN
Operating system: Windows 7 32-bit (You can test other systems)
Procedure:
Step 1: Install ScanMaster-ELM v2.1 software
Open Software CD or download software
Open ELM327 SCAN folder->ScanMaster-ELM327 v2.1 folder Open ScanMaster-ELM327 v2.1 setup Select setup language Install ScanMaster-ELM setup Wizard Accept license agreement Select destination location Select Start Menu folder Press Install Complete setup wizard. Click on Finish. Open KeyGen
Open ScanMaster-ELM software on desktop
It will ask you enter Name and Company Name:23123123 Company:2132313
Press Continue button
It will display a Install Code. Copy the code and paste to KeyGen
Press on Generate Key
Copy the generated key to ScanMaster-ELM327 register area, click on Register
Press Continue
1 keys registered
Software has been registered and activated.
Step 2: Install PCMSCAN V2.4.12 software
Open ELM327 SCAN folder->PCMSCAN v2.4.12 folder Install PCMSCAN v2.4.12 setup Install PCMSCAN installation Wizard Accept license agreement Choose destination location PCMSCAN has been successfully installed. Click on Finish If you cannot find PCMSCAN software on desktop Try click on Start->All Programs->PCMSCAN, send PCMSCAN software shortcut to desktop Open PCMSCAN software Accept license agreement Enter Registration code Open PCMSCAN KeyGen, press Generate button. It will generate Customer ID and License key. Copy Customer ID and License key to correspoding area Press OK
PCMSCAN software is installed
Step 3: Install FVDI J2534 driver
Open software CD Open FVDI_J2534_Ford_Setup Select setup language Select setup type: Full installation Select all components should be installed Select additional tasks: Install USB drivers and install VS2012 package
Installation complete.
Select no to restart computer now. Click on Finish. FVDI J2534 driver installation completed. Confirm LED is flashing with green color and PS switch button is pressed down. Delete FVDI J2534 for Ford to Recycle Bin Check Device Manager to make sure device is well connected with computer
Step 4: Setup COM Port for ScanMaster-ELM
Open ScanMaster-ELM v2.1 software on desktop Select Interface Type: Serial(RS232 or Virtualk COM Port Driver), Port: COM6 and Maunually Set Press OK Click on Connect top make a connection with vehicle and computer Now you can check Vehicle info, view System Status, read/clear Trouble codes, View Freeze Frames and check Oxygen Sensors, PID cofig, Live Data Graph, Actuator, live data grid etc
Step 5: Run PCMSCAN
Open PCMSCAN software on desktop Click on Connect icon Select diagnostic system: OBDII Press OK If software prompt no vehicle connected, check your connection, if yes, press OK to ignore Now you can use PCMSCAN software to read/cl;ear trouble codes, data view,view freeze frame data, check Oxygen sensors, monitor status etc.
How to program Renault Duster 2016 key bypass using OBDSTAR X300 DP/X300 DP Plus tablet.
Connect X300/Key Master DP plus with vehicle via OBD
Turn on ignition switch
All procedure is done via OBD. Here’s the test equipment.
Select Immobilizer function->Renault->Renault V30.33->Program keys->Duster->2014-2018
The function is available by connecting the server, enter the internet connection is normal.
Select Program keys
Turn ignition off and remove key
OBDSTAR X300 DP Plus read VIN success
Reading data
Insert key and turn on ignition
Program success. Press Yes to program next key
Insert new key and turn on ignition
2nd key programming success
Save key information
Turn off ignition
Turn on ignition
Programming completed.
Test the new keys.
http://www.key-programmer.org/2018/09/12/2016-renault-duster-key-programming-bypass-with-obdstar-x300-dp-plus/
Good news!!! For customers who bought Xtool EZ400 Pro diagnostic tablet, you can add Malaysian vehicles for FREE!!
Provide your EZ400 pro serial number, we will activate the authorization for you.
Xtool EZ400 Pro Malaysia function:
-Local Malaysia vehicles Proton & Perodua
-Tuning
-Wifi online update
-Immobilizer
-same function as Xtool PS90
Xtool EZ400 Malaysia function & feature:
-Online Update via WiFi
– Immo key programming -CVT Clutch Adaptation -Throttlebody learning -New Key registration -All Key lost -Tuning -Air Bleeding -Oil Reset -Battery Matching -Steering Angle Adaptation -Meter adjustment – a lot of special functions
Xtool EZ400 Pro FAQ:
Q: this is latest version? 2018? this Malaysia version?
A: Yes, you can add Malaysia models for free.
Q: Can scan all model in Malaysia?
A: there is no tool can do all models, but this EZ400 PRO version is best multi-function tool for Malaysian cars.
Q: Perodua can get to?
A: Yes. but not all cars.
Q: Does this tools can perform new replaced pumps re-learn for diesel car ?
A: Yes. can for hilux etc . even benz sbc pump, diesel engine D4d engine injector compensation etc.
CGDI Prog BMW key programmer software released to V2.5.5 on September 6th, 2018. CGDI BMW V2.2.5 Update Feature: (2018.09.06) 1. Fix some win7 users fail to open the software. 2. Fix a problem that a version has failed to erase the mileage. 3. OBD key matching: increase support for 9389115, 9395657 two versions of CAS3++ 4. BMW ISN: Add 9389115, 9389116, 9395656, 9395657 four versions of CAS read, write, read and write ISN 5. Increase CAS mileage reset function, support CAS1-CAS3+, a small number of versions of CAS are not supported, if you do not support you can try to upgrade to a supported version. The following are the supported CAS hardware numbers: CAS3:6943770,6943774,6943776,6943777,6943779,6943780,6943783,6943784,6943788,6943790,6943798,6943805,6943806,6943816,6943817,6943823,6943824,6943832,6965769,6985696,6985697,9147170,9147171,9147184,9147193,9147194,9147197,9147198,9147199,9147200,9147201,9147202,9147207,9147208,9147209,9147210,9147211,9147218,9147219,9147228,9147229,9230591,9257219,9257220,9273192,9273193,9283153,9283154,9314256,9321069 CAS2:4113748,4113918,4113919,4114222,4114373,4116023,4116658,4117916,4119466,4121910,4125233 4125709,4142256,6922390,6927930,6931395,6943745,6960978,6961659
Xentry Openshell XDOS Windows 10 installation tips and guides for newbies:
– XDOS Windows 10 Startkey not valid
– XDOS Windows 10 security settings
– No Windows 7 VMware on Windows 10
– Windows 10 Ad-Hoc Fix
– Ad-Hoc connection on Windows 10
– Sdconnect C4 Wifi connection on Window 10
– 09.2018 XDOS Windows 10 reliable source
In detail…
(Note that all solutions here are based on personal experience and you can have a try as you want, but no one will hold responsibilities of what will happen to your tool and car. Good luck!)
I have strange problem with XDOS version on Win 10 x64: In ConfigAssist I can’t enter Xentry key – “StartKey not valid error”
I try to use standalone key center but see 0x8000704C7 error when I start it. For Win10x64, it is one of the recommended system requirements by Mercedes. but maybe there is some obstacle(s) but a member wrote in this thread that he could handle it as well.
Xentry xdos: xentry diagnosis for 12/24v using partd aka C3 (obsolete), sdconnect aka C4, ecom, xentry connect aka xentry kit 2, and bosch vci aka xentry kit 3
Xentry passthru EU or USA: xentry diagnosis using J2534 passthru devices e.g: mercedes passthru vci (12/24v), avdi, vas5054a (12v), drewtech MongoosePro (12/24v) and many other J2534 compatible devices.
I have enough problems with w10 and security settings I just used w7 x86 ultimate went thru no problems did all my addones 1st took some time but , for some reason no taskbar icom for connection setup but can manually open .
if you install xentry passthru, it will not install sdconnect toolkit.
but if you install xentry xdos, the sdconnect toolkit will be installed. you can set to ‘show’ in the taskbar tray at right bottom corner.
Are you booting into a Win7 VM or some sort of Win7 image on your Win10 laptop?
No VMware no win 7 image. It working on Windows 10 64bit professional. The same Ad-hoc like on Win 7. WEP is not problem. You have to manually set new connection with name Road24h/WEP/key uncheck automatic connection or something like this /I forgot/ then use solution which posted Mr.Rocinante and allow Ad-hoc thats all. This working for me. You can see on picture in my post how is connected SDConnect. I tested it on 3 cars and no problem with Ad-hoc. I reinstall full system now because I found one larger hdd
On win 10 will be hard as hosted networks on win 10 not accept wep anymore
This is how I fixed the Win10 Ad-Hoc, wireless SDConnect C4 connection issue.
I downloaded the Win 8.1 wireless adapter drivers for my specific wireless card.
Download ONLY the drivers, not the software suite with the driver. The Win 8.1 drivers will allow Ad-Hoc to function under Win 10.
I deleted/uninstalled my wireless adapter card to remove all current drivers associated with this wireless adapter.
I double clicked the .exe driver file for Win 8.1. The software found my wireless adapter and installed the Win 8.1 drivers.
Rebooted system, Ad-Hoc functions properly now.
Hope this works for others using Win 10.
There seems a problem between Ad-hoc and win 10?
This solution working but also need to be allowed Ad-hoc.
On the pictures you can see adhoc connection on win 10. You need settings from thread “sdconnect xdos configuration” you need set up new connection Road24h with wep encryption and allow adhoc that’s all.
Can somebody help me with wifi connection C4 and win 10
It worked for me
To save an ad-hoc network and its network key on the guest computer (running Windows 7)
Note down the SSID, security type, encryption type and the key of the ad-hoc network.
Disconnect your connection to any wireless network and switch off/disable your wireless device. Turn on/enable your wireless device but don’t connect to any network. (Thanks GK.) Click on the network icon in the taskbar. Click Open Network and Sharing Center > Manage Wireless Networks > Add. Click “Manually create a network profile”. (This may look silly but we really are going to create an infrastructure network now.) Enter the network name (SSID), security type, encryption type (if any) and the key that you noted in step 1. Uncheck both checkboxes (“Start this connection automatically” and “Connect even if the network is not broadcasting”.) [Note that you cannot have the connection start automatically. If you try to have it checked, step 10 will fail. A different way to start it automatically during system boot is described below.] Click Next > Close. Your connection must appear in the list with the icon suggesting infrastructure (two big screens connected to a tube). Don’t worry about it. Click Start, type in “cmd” in the search box, press Enter. In the Command Prompt, type in “netsh wlan set profileparameter name=NetworkName ConnectionType=IBSS”, exactly as shown, without quotes, except you must substitute NetworkName with the SSID (network name) of your ad-hoc network. If everything went well, you’ll see that the icon has now changed to an ad-hoc icon (three small screens connected to each other) in the Manage Wireless Networks window. Turn on/enable your wireless device, and try connecting to the Ad-hoc network. You will notice that you no longer need to enter the network key.
To automatically connect to a saved ad-hoc network during Windows boot (can be applied to both guest and host computers running Windows 7)
Click Start > point to All Programs > right-click Startup > click Open. (You may choose Open All Users instead if you prefer).
Right-click an empty space and click New > Shortcut. Type in “netsh wlan connect NetworkName”. Once again, NetworkName must be substituted with the SSID of your ad-hoc network. Click Next and enter a fancy name such as “Connect to NetworkName” or something like that. Click Finish and you’re done. This shortcut will run when Windows starts up, giving you a very brief flash of the black command window, followed by your computer connecting to the ad-hoc network if it is available. Tip: You can also pin the shortcut in your taskbar or copy it to the desktop to easily connect to the network any time you want.
Note: You will probably need Administrator access to complete some of the steps above (in both procedures).
Do you have any reliable link for 09.2018 Xentry? Better have been confirmed to work no issues with SDconnect?
I’m using the site http://www.obdii365.com/wholesale/201809-mb-sd-connect-compact-c4-software-ssd.html good tech support. Free activation help via remote
Upload images…
|
AuthorCategories |